Margin Grout Float
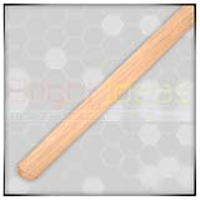
A wooden handle margin grout float with 3mm gum rubber bonded to a 15mm EVA pad with an aluminium back, recommended for applying grout in tight and compact areas. >More ideal for applying grout to smaller areas and surfaces How to Apply Grout: What you'll need:- - Margin Grout Float - Grout - Tile Scriber (Optional) - Hydro Cleaning Sponge - Washset (Optional) - Clean Water - Latex Gloves 1) Before grouting the tiled area, proceed to remove any tile spacers from in-between the grout line of the tiles. Now is also a good time to also check if all of your tiles are fixed firmly in place. If any of the tiles are loose carefully remove the tile and apply a small amount of adhesive using a Bright Ideas Notch Trowel to the back of the tile and carefully fix it back in place. 2) To apply grout to the tiled area, use a Bright Ideas Grout Float. If you are using an epoxy grout please use a Bright Ideas Epoxy Grout Float with either a white or green base. It is recommended to apply grout in small areas, preferably around an area of 4sq.ft. This is an effective way of keeping your work area manageable as grout tends to set fairly quickly. Attempting to spread grout over a larger area could result in the grout setting before you can smooth it off. 3) Use the grout float by tilting it at a 45° angle to spread the grout across the tiled area. Positioning the float at this angle will ensure that the grout will be pushed down firmly into the cracks in-between the tiles. Once the grout has been successfully placed into the seams use the grout float to rub off any grout that is remaining on the surface. 4) Once the grout has been applied to the work area, proceed to work the grout by using a Bright Ideas Hydro Sponge. This involves cleaning the tiled area whilst at the same time compacting the grout between the tile seams. Hold the hydro sponge diagonally to the tile seams and push down with some slight pressure whilst cleaning / compacting the grout. Make sure you rinse the sponge frequently with clean water so you don't end up cleaning the tiled area with dirty water. 5) Repeat steps 1 to 4 for all subsequent tiled areas that need to be grouted. 6) When applying grout it is recommended you wear a pair of Bright Ideas Latex Gloves which will protect your hands from harmful substances in the grout. If you find you are going to be kneeling down for long periods of time wear a pair of Bright Ideas Knee Protectors and a Bright Ideas Lifters Back Support Belt for comfort. 7) For a faster and easier way of grouting tiles, please see our Washset Section of the website, which provides you with everything you need for a successful and professional finish to the tiled area.Visit the Bright Ideas Co website for more information on Margin Grout Float

