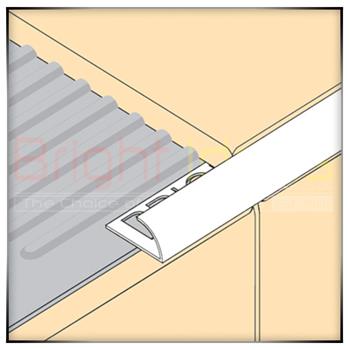
PVC Round Edge Tile Trim (Length = 2.5m)
Tile trims have been around for many, many years and are designed to cover exposed wall tiles and for also adding a division between floor tiles and other floor materials (i.e. laminated flooring and carpet). The trim acts to protect the edges of tiles from damage including chipping and cracking and come available in a variety of different materials, colours and finishes. When to Use: - Ideal for use when tiling to firmly cover up and protect edging and corners whilst tiling. Colours Available: - White, Ivory, Black, Soft Peach and Almond. Main Benefits: >Tile Trims provide a decree of safety with their smooth surfaces, rather than the exposed rough surface of the tile >Reduce risk in damaging the tiles when there is a change in direction >Generally give the tiled area a professional looking finish How to Install Tile Trim: What you'll need:- - Tile Trim - Adhesive - Tile Saw / Hack Saw - Mitre Block - MitreRite PVC Trim Cutter (Optional) - China Pencil - Ratchet Speed Clamp - Notch Trowel - Grout Float - Hydro Cleaning Sponge 1) The first step to successfully installing tile trim is to determine whether or not the trim will just be installed to the wall or to the corners as well. When applying trims to the floor ensure that you place trims on all edges or to the edge where the tile itself joins with the other floor material. 2) When you have determined the area to be tiled, proceed to measure out the correct length of the area and apply these measurements to the length of the trim that needs to be cut. Double check the measurements as a precaution, as this is vital prior to cutting the trim. 3) Use a Bright Ideas China Pencil to mark on the trim where it will need to be cut. Use a colour in contrast to the trim (i.e. a blue or black pencil will work fine on a white, peach or beige trim but not on a blue or black trim). 4) For tile trims that will be fixed at the edges of walls as well as the base, cut the edges of the trim at a 45° angle. To cut the trim, place it in a Bright Ideas Mitre Block and to add stability also use in conjunction with a Bright Ideas 6" Ratchet Speed Clamp. Using the chanels of the mitre block as an extra guide, proceed to cut the trim with a Bright Ideas Tile Saw / Hack Saw. If the trim does not need to be mitred, cut it at a 90° angle. 5) For cutting round edged trims to be fitted around window sills, it is recommended you use the Bright Ideas PVC MitreRite Trim Cutter with Adjustable Guide to cut the edges at a 45°. This will allow you to create a picture frame effect as the edges will join squarely together. For metal round edged trims, use a mitre block and tile saw / hack saw as described in step 4 above. 6) Repeat steps 2 to 4/5 for all subsequent tile trims that need to be cut. 7) With the trim cut, mark the walled area (or floored area if installing to a floor) and mark the area with chalk. Using a Bright Ideas Notch Trowel, spread adhesive briefly over the area and firmly bed the tile trim into the adhesive. Give the adhesive sufficient time to set, preferably overnight. 8) Once the adhesive has fully set check any areas of the trim where there are spaces that need to be filled with grout. Using a Bright Ideas Grout Float, fill these spaces with grout and leave it for a while to allow the grout time to dry. 9) When the grout is dry, wash any excess grout away with a Bright Ideas Hydro Sponge. For further effectiveness apply a sealer onto the grouted area for increased protection for a longer lasting life span. For a list of sealers, please see our SEALERS & CLEANERS section of the website.Visit the Bright Ideas Co website for more information on PVC Round Edge Tile Trim (Length = 2.5m)


