Hanging Instructions
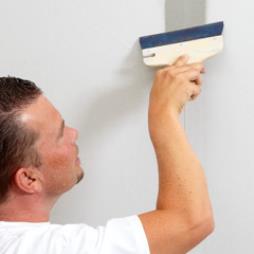
Glasstex is the lightest glass textile in the market, which makes it the easiest to install. This is evident in difficult areas, such as around pillars, corners and edges. Glasstex is pliable and can take rough handling, whether wet or dry. It is easy to smooth out folds and air bubbles without disrupting the weave. You can even remove Glasstex from the wall and re-hang it, if necessary. The weave holds together when being trimmed, and joints are invisible after painting. Since Glasstex is so easy to apply, you can save both time and money. It also improves the painter’s work environment. 1.Step One - Prepare the wall by filling any holes.Prepare the wall by filling any holes or irregularities. Click here for detailed instructions. 2.Step Two - Roll the adhesive onto the wall.Roll the adhesive onto the wall using ”GLASSTEX ready mixed adhesive” or “Solvite High Performance Adhesive”. 3.Step Three - Cut the fabric into lengths.Cut the fabric in lengths. Measure the height of the wall +10 cm. For pattern matching allow extra fabric. 4.Step Four - Apply the fabric at the ceiling.Apply the fabric at the ceiling and press down. Make sure that the first length hangs vertically. 5.Step Five - Hang the fabric edge to edge.The fabric has trimmed edges, which allows hanging edge to edge. 6.Step Six - Press well onto the surface.Press well onto the surface with a plastic spatula or a steel putty knife with rounded corners. 7.Step Seven - Trim neatly with bladed knife and straight edge.Trim neatly at the ceiling and floor using bladed knife and straight edge. 8.Step Eight - Once dried, paint the fabric.Start to paint the wall when the fabric has dried. Use an angled brush or a small radiator roller along ceiling, floor etc. Then apply the paint with a roller. Two coats of paint are normally enough.Visit the Eclipse Wallcoverings website for more information on Hanging Instructions


