Maintenance
Even though GLASSTEX wallcoverings are very durable, a forceful or sharp impact might damage the wallcovering or the wall itself. But repair is fast and easy using standard wallcovering tools. 1.Glasstex Maintenance Step One - Cut out the damaged areaCut a piece of GLASSTEX wallcovering several inches larger than the damaged area. Carefully line up the pattern or texture with the original wallcovering. Then tape it into position over the damaged area. 2.Carefully double cutting the new piece of GlasstexDouble cut both the new piece of GLASSTEX and the damaged GLASSTEX to ensure a precise seam when the repair is finished. 3.Removing the damaged area of Glasstex wall coveringRemove both the new piece of GLASSTEX and the damaged wallcovering. Note the orientation of the patch so it can be properly installed later. 4.Applying adhesive to the exposed wallIf the wall is not badly damaged (small holes, dents or scratches), there may be no need to repair the wall. Just apply adhesive to the area where the wallcovering was removed. If damage to drywall or plaster is extensive, you may need to repair the area with filler or drywall compound. 5.Carefully lining up the new piece of GlasstexPlace the GLASSTEX patch onto the repair area, and carefully line up the pattern or texture. Firmly brush GLASSTEX into the adhesive. There is no need to roll edges or seams. 6.Painting over the new Glasstex results in a professional patchPaint the patch and adjacent area with a roller using the same paint that was originally used on the wall. The combination of paint and GLASSTEX pattern result in a neat professional patch.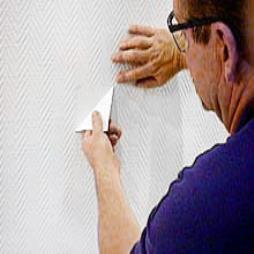
Visit the Eclipse Wallcoverings website for more information on Maintenance
ENQUIRY FORM